Room-by-Room Packing Method: Complete Moving Guide for Every Home
Room-by-Room Packing Method
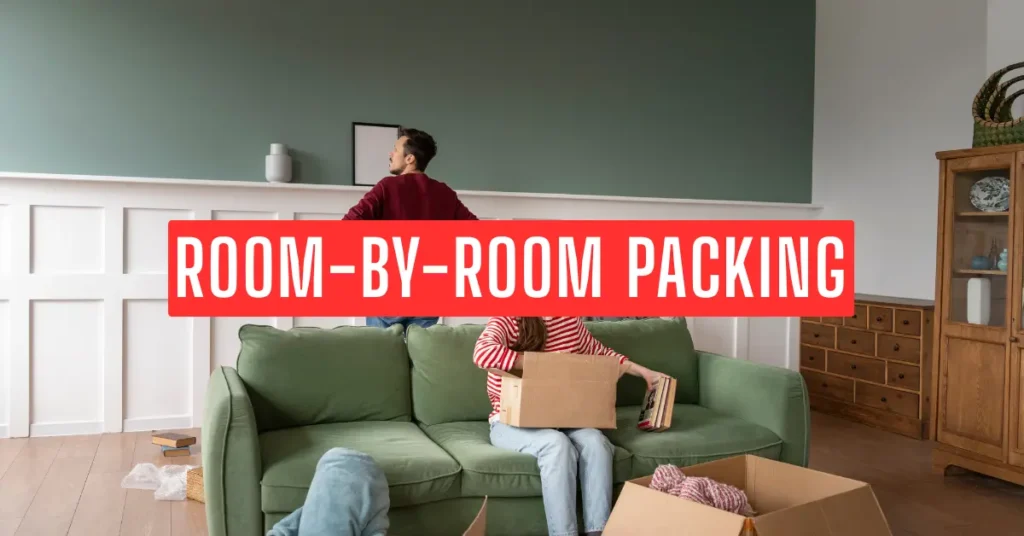
Packing your home becomes dramatically easier when you follow a room-by-room packing method—a systematic approach that reduces chaos, speeds up the process, and ensures nothing gets misplaced. Whether you’re moving locally or long-distance, this method helps you stay organized and stress-free from start to finish. If you want a professional team to handle the packing and moving for you, check out our trusted partners Movers and Packers.
Why This Method Works (Quick Overview)
A room-by-room strategy ensures you complete one zone fully before jumping to the next. This means:
- No mixing items from different rooms
- Easier inventory and labeling
- Faster unpacking
- Fewer misplaced essentials
- Better decluttering flow
How the Room-by-Room Method Helps You Stay Organized
Below is a quick look at how this method reduces moving-day stress:
Benefit | How It Helps You |
Focus on one room at a time | Eliminates confusion and keeps progress clear |
Better labeling system | Speeds up unloading and unpacking at the new home |
Efficient use of packing supplies | Helps avoid overpacking or wastage |
Cleaner decluttering workflow | Allows you to discard unnecessary items room-by-room |
Easy coordination with movers | Movers instantly know where each box belongs |
Tips to Make the Room-by-Room Method Even More Effective
- Start with low-use rooms such as guest rooms, storage, or the dining area.
- Keep an inventory notebook or digital list for each room.
- Assign a color per room (kitchen = yellow, bedroom = blue, etc.) for labeling.
- Pack essentials last—bathroom items, daily kitchen items, chargers, and bedding.
- Avoid mixing rooms in the same box to prevent confusion during unpacking.
- Place fragile items together and clearly mark their boxes.
- Use the right size box—heavy items in small boxes, lighter items in large ones.
Why the Room-by-Room Packing Method Works Best
The room-by-room packing method is one of the most efficient ways to organize a home for relocation. Instead of jumping between areas, you finish one complete space at a time—reducing clutter, improving focus, and making unpacking easier. This approach is especially useful for households with multiple rooms, families with kids, or anyone who wants stress-free moving.
How This Method Reduces Packing Stress
Packing room-by-room removes the mental overload that comes from tackling the whole house at once. By breaking the process into manageable chunks:
- You stay organized and avoid mixing items
- It becomes easier to track what’s packed and what remains
- Each completed room gives a sense of progress
- Less chance of losing essentials
This structured workflow helps prevent last-minute rushing and reduces packing fatigue.
Benefits for Large Homes vs. Small Apartments
This method works for every type of home, but the advantages differ slightly:
Home Type | Why It Helps |
Large Homes | Simplifies managing multiple rooms, prevents overwhelming clutter, easier to assign rooms to helpers. |
Small Apartments | Prevents mixing items in tight spaces, keeps the home functional for longer during packing. |
For bigger homes, completing zones in sequence helps you avoid chaos. For smaller spaces, it ensures essential areas stay usable until the final days.
Why Movers Recommend the Room-by-Room Approach
Professional movers often prefer this method because:
- Boxes from each room go directly to their designated areas in the new home
- Labels become clearer and more accurate
- Fragile items from each room can be handled carefully
- It speeds up loading and unloading
- Inventory management becomes more precise
Movers can immediately place boxes in the exact rooms they belong to, helping you unpack faster and avoid the frustration of searching through mixed boxes.
This structured method also helps professional packers and movers place boxes directly in the correct rooms during unloading.”
Essential Packing Supplies You’ll Need Before Starting
Before you begin packing room-by-room, gather all the essential supplies so the process stays smooth and interruption-free. Having the right packing materials ensures your items stay protected, boxes remain organized, and fragile belongings are safe during transport. A well-prepared supply kit also helps you maintain speed and consistency across every room.
Types of Moving Boxes (Small, Medium, Large & Specialty)
Using the correct box size is crucial:
- Small Boxes – Ideal for books, kitchen jars, tools, pantry items, cosmetics.
- Medium Boxes – Best for clothing, small appliances, toys, and linens.
- Large Boxes – For lightweight but bulky items like pillows, blankets, lampshades.
- Wardrobe Boxes – Come with a metal hanging bar for wrinkle-free clothing.
- Dish-Pack Boxes – Double-walled and padded for plates, bowls, and glassware.
- TV & Electronics Boxes – Provide reinforced foam inserts and structured protection.
Quick Comparison Table
Box Type | Best For | Why Use It |
Small Box | Books, jars, toiletries | Reduces weight, prevents box damage |
Medium Box | Clothes, toys, utensils | Versatile and easy to carry |
Large Box | Bedding, cushions, decor | Fits lightweight, bulky items |
Wardrobe Box | Shirts, suits, dresses | Prevents wrinkles and folding |
Dish-Pack Box | Plates, bowls, glassware | Extra cushioning for fragile items |
TV/Electronics Box | TVs, monitors, consoles | Shock absorption & corner protection |
Protective Wrapping Materials
To minimize breakage, always stock:
- Bubble wrap for fragile pieces and electronics
- Packing paper for plates, glasses, and decor
- Foam sheets for delicate kitchenware
- Furniture blankets to protect wooden or glass furniture
- Stretch wrap to secure cabinet doors, drawers, and bundled items
These materials cushion items from shocks, pressure, and vibration during transit.
Tools You Cannot Skip
A basic packing toolkit keeps everything efficient:
- Heavy-duty packing tape + tape dispenser
- Permanent markers for labeling
- Ziplock bags for screws, cables, and tiny accessories
- Scissors or cutter
- Fragile stickers and color-coded labels
Specialty Supplies for Delicate Items
Some items need extra care:
- Mattress covers to protect from dust and moisture
- Bottle protectors for oils, liquids, or glass bottles
- Cable ties for electronics
- Corner protectors for mirrors & frames
With all supplies ready, you can start packing room-by-room efficiently without backtracking.
Using the right materials becomes even more critical when you’re hiring packers and movers in Amritsar for a full-service relocation.
How to Create a Room-by-Room Packing Checklist
A room-by-room packing checklist helps you stay organized, avoid missed items, and streamline both packing and unpacking. Creating a structured checklist ensures you can monitor progress in every room, pack efficiently, and communicate better with your movers. This becomes even more important when you’re dealing with multiple rooms, family members, fragile items, or a tight moving deadline.
Step-by-Step Pre-Packing Plan
Before writing your checklist, follow this preparation process:
- Walk through your home and list every room (including storage areas).
- Identify priority rooms — pack low-use rooms first, daily-use rooms last.
- Separate fragile, valuable, and bulky items for special handling.
- Clean and declutter each room before adding items to your checklist.
- Create a digital or notebook-based inventory to track progress room-wise.
This initial planning makes your checklist more accurate and easier to follow.
Sorting & Decluttering Strategy for Each Room
To avoid moving unnecessary items:
- Set up three categories: Keep, Donate, Discard
- Remove duplicates (kitchen tools, stationery, containers)
- Check expiry dates in kitchens and bathrooms
- Let children choose items they no longer use
- Create a “maybe box” for undecided items—review it before moving day
Decluttering first reduces packing time and saves money by lowering the number of boxes.
How to Prioritize Rooms Based on Usage
Use this room-priority flow:
Priority Level | Rooms | Why Pack Them at This Stage |
Low-Use Rooms | Guest room, store room, dining room | Minimal daily impact, fastest to finish |
Medium-Use | Bedrooms, living room, study/home office | Pack non-essentials first, essentials later |
High-Use | Kitchen, bathroom | Pack these last to maintain daily convenience |
This sequence keeps your home functional during the packing process.
Creating a Packing Timeline That Works
A good timeline keeps everything moving smoothly:
- 3 weeks before moving: Pack storage and spare rooms
- 2 weeks before: Pack bedrooms and living areas
- 1 week before: Pack kitchen non-essentials and decor
- 2–3 days before: Pack essential kitchenware and remaining clothes
- Moving day: Pack final toiletries, chargers, bedding, and daily-use items
Your checklist should follow this timeline to prevent last-minute rush.
Packing the Living Room: Furniture, Electronics & Decor
The living room contains some of the most delicate, bulky, and high-value items in your home—TVs, electronics, decor pieces, lamps, carpets, and furniture. Packing this room requires extra care and the right supplies to avoid damage during transit. Following a structured room-by-room method ensures every item is safely wrapped, labelled, and easy to unpack later.
Safely Packing TVs, Consoles & Wires
Electronics are sensitive to shock, dust, and temperature changes, so pack them with precision:
- Use a TV-specific box or the original packaging if available.
- Pack TV upright, never flat, to avoid screen stress.
- Wrap screens with foam sheets + bubble wrap for corner protection.
- Remove all cables, roll them neatly, and label each one.
- Place remotes, screws, and mounts in zip bags taped to the TV box.
- Game consoles and set-top boxes should be wrapped individually and cushioned with soft padding.
Tip: Photograph cable setups before disconnecting to make reconnection easier.
How to Wrap Glass Decor & Photo Frames
Living rooms often have fragile décor items such as vases, figurines, photo frames, trophies, and mirrors. Pack them using:
- Double-layer bubble wrap for glass pieces
- Corner protectors for frames and mirrors
- Packing paper between each frame to prevent scratches
- Small boxes for delicate items; medium boxes for multiple frames
Place heavier glass pieces at the bottom, lighter ones on top.
Packing Rugs, Curtains & Lamps
A few quick steps make these bulky items easier to handle:
- Vacuum rugs before rolling to remove dust
- Roll rugs tightly and secure with stretch wrap
- Use tall boxes for lamp bases and lampshades (pack separately)
- Fold curtains and store in labelled, breathable bags
Lampshades should be stored upright and filled with soft paper to maintain shape.
Furniture Protection Techniques (Sofa, Coffee Table, Cabinets)
Proper furniture protection prevents scratches, dents, and fabric damage:
Furniture Item | How to Pack It |
Sofa & Chairs | Wrap with moving blankets; cover fabric with stretch wrap |
Coffee/Side Tables | Remove legs (if possible) and wrap separately |
Glass Furniture | Use cardboard sheets + foam padding + bubble wrap |
Cabinets & Drawers | Empty fully; secure doors with stretch wrap |
Disassembling large furniture makes loading easier and reduces the risk of breakage.
Bedroom Packing Guide: Clothes, Bedding & Personal Items
Bedrooms may seem simple to pack, but they contain a mix of clothing, sentimental items, accessories, electronics, and bulky bedding. A structured room-by-room strategy helps you pack each category safely while keeping everything organized for quick unpacking later. The key is to start with non-essentials, pack valuables separately, and use the right materials for clothing and fabrics.
Decluttering Wardrobe Before Packing
Before packing clothes:
- Remove items you haven’t worn in a year
- Donate or recycle old shoes, jackets, scarves
- Sort clothes by season (summer, winter, occasional wear)
- Discard damaged items you no longer use
- Create a “moving-week clothing set” to wear until moving day
A minimized wardrobe reduces the number of boxes and saves moving costs.
Best Way to Pack Clothes (Fold vs. Roll)
Choose a packing method based on clothing type:
Folding Method (Best for structured clothing)
- Shirts
- Jeans
- Formal wear
- Sweaters
Rolling Method (Space-saving for casual items)
- T-shirts
- Leggings
- Gym wear
- Sleepwear
Smart Clothing Tips
- Use wardrobe boxes for hanging clothes to prevent wrinkles
- Pack shoes in original boxes or wrap individually
- Place socks or scarves inside shoes to save space
- Keep delicate fabrics in garment bags or wrap with tissue paper
Packing Jewelry & Valuable Items Safely
Jewelry and valuables must be handled separately:
- Use a small jewelry organizer or pill box for earrings & rings
- Wrap necklaces in tissue to prevent tangling
- Use zip bags for small precious items
- Pack watches and delicate accessories in padded pouches
- Carry expensive jewelry personally, not in the moving truck
This prevents loss, damage, or misplacement during the move.
Bedding, Pillows & Mattress Protection
Bedroom bedding items are bulky but easy to pack with the right strategy:
Item | How to Pack It |
Pillows | Compress into large plastic bags or moving bags |
Blankets | Fold tightly and place in large boxes |
Bedsheets | Use small/medium boxes to avoid shifting |
Mattresses | Cover with waterproof mattress bags |
Comforters | Store in vacuum bags to save space |
Tip: Keep one set of fresh bedding accessible for the first night in your new home.
Kitchen Packing Method: Glassware, Appliances & Pantry Items
The kitchen is one of the most time-consuming rooms to pack because it contains fragile glassware, sharp utensils, liquids, food items, and small/large appliances. A room-by-room packing method helps you stay organized and ensures every delicate item receives proper protection. Start early, work in categories, and use the correct packing materials to avoid breakage.
Preparing the Kitchen Before Packing (Cleaning & Sorting)
Before you begin:
- Clean and dry all utensils, plates, and appliances
- Sort items into categories: Glassware, Appliances, Utensils, Food, Cookware
- Discard expired pantry items
- Donate unopened non-perishable food you don’t need
- Remove oil and water from appliances like fryers or kettles
- Keep daily-use essentials aside for the last 2–3 days
This step helps avoid spills, clutter, and unnecessary packing.
Bubble-Wrap Technique for Plates, Cups & Bowls
Glass items need special attention:
- Use dish-pack boxes for plates and fragile cookware
- Wrap each plate individually with packing paper
- Stack plates vertically instead of flat
- Use bubble wrap or foam sheets between each item
- For cups and glasses, stuff the inside with crumpled paper
- Wrap each glass fully and pack upright
Recommended Packing Layout
Item | Packing Method |
Plates | Vertical stacking with padding |
Bowls | Nested with paper between each |
Glasses | Wrapped individually and placed upright vertically |
Mugs | Stuff inside + double wrap outside |
Ceramic Items | Double cushioning with bubble wrap |
This technique prevents cracks caused by pressure and vibration during transport.
Packing Large & Small Appliances
Appliances must be cleaned, dried, and secured properly:
- Remove detachable parts (blades, trays, lids) and pack separately
- Wrap appliances with bubble wrap or foam sheets
- Use original boxes when possible
- Tape cords to prevent tangling
- Place heavier appliances at the bottom of the box
- Label boxes clearly: “Kitchen – Appliances – Fragile”
For large appliances like mixers or microwaves, use thick, double-walled boxes.
Handling Pantry, Liquid Items & Spices
To prevent leaks and food waste:
- Discard expired spices, jars, and sauces
- Seal open packets in zip bags
- Wrap oil bottles and sauces with plastic wrap + bubble wrap
- Keep only non-perishable items for moving
- Group spices in a small box with tight lids
- Do not pack perishables unless moving locally
If the move is long-distance, avoid carrying anything that may spill or spoil.
Bathroom Packing: Toiletries, Medicines & Safety Supplies
Bathrooms are packed with liquids, glass containers, medications, grooming tools, and small loose items—making them one of the trickiest rooms to pack. A careful and organized approach will help prevent leaks, breakage, and clutter during the move. The key is to sort items first, pack only what’s needed, and secure all liquids properly.
Leak-Proof Packing for Liquid Toiletries
Liquids like shampoos, oils, soaps, lotions, perfumes, and cleaning products must be packed in a way that prevents spills during transit. Follow these steps:
- Remove lids, cover openings with plastic wrap, and then tighten lids again
- Place each bottle inside ziplock bags
- Use tape to secure pump bottles so they don’t open accidentally
- Pack liquids upright in a small, sturdy box
- Use towels or washcloths for extra padding
- Label the box clearly as “Bathroom – Liquids – Keep Upright”
This eliminates leaks that could damage clothes, books, or electronics in nearby boxes.
Checking Expiry Dates & Discarding Old Items
Before packing, check the following:
- Expired medicines
- Old makeup, skincare, sunscreen
- Used disposable razors
- Empty or nearly empty bottles
- Outdated hair tools or accessories
Throwing away expired or unnecessary items reduces the number of boxes and ensures a fresh, clutter-free bathroom in your new home.
Packing First Aid & Daily Essentials
Always set aside an Essentials Bag that you’ll keep accessible during and after the move. Include:
- Toothbrush, toothpaste, and soap
- Daily medicines
- Small first-aid kit
- Hairbrush or comb
- Deodorant
- Quick-dry towel
- Shower essentials for the first day
This prevents the frustration of digging through boxes right after you arrive.
What to Keep Handy in a “Bathroom Essentials Box”
For smoother unpacking, prepare a clearly labeled box with:
Category | Examples |
Hygiene Items | Shampoo, soap, face wash |
Daily Use Items | Moisturizer, deodorant, comb |
Medicines | Daily pills, pain relievers, ointments |
Grooming Tools | Hairdryer, trimmer, shaving kit |
This box should be placed on top of all other bathroom boxes so it’s the first thing you access at your new home.
Packing the Kids’ Room: Toys, Books & Study Materials
Kids’ rooms are filled with toys, books, clothes, school items, gadgets, and sentimental belongings. Packing this room requires extra care because many items are fragile, oddly shaped, or emotionally important to the child. Following a room-by-room packing method helps you stay organized while keeping your child comfortable during the transition.
Sorting Toys by Category (Soft, Battery, Educational)
Start by separating toys into clear categories:
- Soft toys – Wash or vacuum before packing; place in large lightweight boxes.
- Battery-operated toys – Remove batteries to avoid leaking during transport.
- Educational toys – Keep small parts in zip bags to prevent loss.
- Construction sets (Lego, puzzles) – Keep each set in a labeled pouch or zip bag.
- Sentimental items – Handle separately and label clearly.
This makes it easier to unpack and avoids missing pieces.
Toy Packing Tips
- Wrap breakable toys in bubble wrap
- Avoid overfilling boxes (kids’ items can be heavier than they look)
- Pack “favorite toys” last and keep a few accessible for moving day
How to Pack Children’s Books Efficiently
Books are heavy, so pack wisely:
- Use small or medium boxes to avoid overweight boxes
- Stack books flat or spine-down to prevent damage
- Separate activity books, coloring books, and notebooks
- Wrap special or collectible books in packing paper
If your child uses study materials daily, keep a small “school essentials” kit handy.
Protecting Artwork & School Supplies
Kids often have drawings, craft projects, awards, and school files that need careful handling:
- Flatten artwork and place in file folders or large envelopes
- Use portfolio sleeves or cardboard sheets to keep them safe
- Pack trophies and craft models with bubble wrap
- Store paints, glue, and liquids in zip bags to prevent leaks
- Keep important school documents in a dedicated folder
This helps preserve memories and prevents delicate items from bending or breaking.
Managing Sentimental Items Properly
Children often have keepsakes such as stuffed animals, handmade crafts, photos, bedtime toys, or special blankets. Handle these items gently:
Item Type | How to Pack It |
Favorite stuffed toy | Keep accessible in a travel bag |
Craft models | Wrap with bubble wrap in separate small box |
Photos or scrapbooks | Store in a rigid folder or padded envelope |
Special blanket | Pack in clean, sealed bag |
To help your child feel secure, let them choose 2–3 “comfort items” to keep with them during the move.
Home Office Packing: Files, Gadgets & Important Documents
A home office contains high-value electronics, confidential documents, cables, books, and office supplies. Because these items are essential for work and often sensitive, packing this room requires a systematic approach. The goal is to protect electronics from shocks, keep documents organized, and avoid tangled cables or misplaced accessories.
Safe Packing for Laptops, PCs & Keyboards
Electronics are vulnerable to dust, pressure, and impact, so follow these steps:
- Back up all data to a cloud drive or external hard drive before packing
- Wrap laptops and tablets in microfiber cloth + bubble wrap
- If available, use original boxes for PCs, monitors, and keyboards
- Pack monitors upright with corner and screen protection
- Use anti-static bags for hard drives, USB drives, and graphic tablets
- Place keyboards in padded sleeves or wrap with two layers of packing paper
Keep chargers, cables, and accessories labeled and placed together.
Cable Management Tips (Labeling & Bundling)
Cables are the most commonly misplaced items during moving. Keep them organized with:
- Zip ties or Velcro straps to prevent tangling
- Color-coded labels to match each cable to its device
- Small zip bags for storing groups of cables
- A separate pouch labeled “Office Cables”
- A quick phone photo of the current cable setup for easy reassembly
This avoids confusion and saves time during setup in your new home.
Organizing Important Documents & Notebooks
Home offices often contain sensitive papers like bills, certificates, financial documents, and client files. Handle these with extra care:
- Use waterproof document protectors or filing folders
- Sort documents: Personal, Work, Financial, Legal, Receipts
- Pack them vertically in a file box to keep them neat
- Avoid placing heavy items on top of document boxes
- Keep important papers (IDs, certificates, legal documents) with you, not in the moving vehicle
This ensures nothing important gets lost or damaged.
Backing Up Digital Files Before Moving
Before you unplug anything, make backups:
Backup Method | Best For |
Cloud Storage | Files, documents, photos |
External Hard Drive | Large files, software backups |
Emailing Yourself Files | Quick access to essential documents |
Mobile Backup | Contacts, photos, apps, notes |
Backups protect your data against accidental damage, loss, or hardware failure during transit.
Packing the Garage & Storage Areas: Tools, Hardware & Extra Items
Garages and storage rooms hold some of the heaviest, most awkward, and sometimes hazardous items in the entire home. These include tools, garden equipment, sports gear, paint cans, chemicals, and seasonal items. Packing this area requires extra caution, proper labeling, and the right containers to ensure safety during transport.
Categorizing Garage Items Before Packing
Begin by separating everything into clear groups:
- Hand Tools (hammers, screwdrivers, pliers)
- Power Tools (drills, saws, sanders)
- Hardware (nails, bolts, screws, nuts)
- Garden Equipment (hosepipes, trowels, shears)
- Sports Equipment (bats, balls, helmets)
- Seasonal Items (holiday décor, camping gear)
This makes packing easier and prevents mixing sharp tools with delicate items.
Sorting Tips
- Gather small hardware in labeled zip bags
- Tape toolboxes shut to keep them secure
- For large tools, remove detachable parts before packing
Safe Packing for Tools & Sharp Objects
Tools can be dangerous if not packed correctly. Follow these guidelines:
- Wrap sharp tools in bubble wrap or thick towels
- Use sturdy small or medium boxes (avoid big boxes for heavy items)
- Secure long-handled tools such as rakes or brooms with zip ties
- Drain fuel from equipment like lawnmowers or trimmers
- Keep toolboxes upright and tightly closed
Wrapping blades and sharp edges prevents injury and damage to other boxes.
Handling Hazardous Materials (Paint, Oils, Chemicals)
Many items in the garage are not allowed on moving trucks. These include:
- Paint cans
- Gas cylinders
- Pesticides
- Oils and lubricants
- Cleaning chemicals
- Car batteries
- Propane tanks
What to do with them:
- Use them up before moving, if possible
- Dispose of them following local waste guidelines
- Give leftover paint or chemicals to neighbors or local community centers
Never pack hazardous materials inside regular moving boxes.
Packing Garden Equipment & Seasonal Items
Garage spaces also contain bulky and oddly shaped items. Pack them safely:
Item Type | How to Pack It |
Garden Tools | Bundle with zip ties and wrap sharp ends |
Flower Pots | Wrap individually with padding |
Sporting Goods | Deflate balls; use large, light boxes for helmets |
Holiday Decorations | Use compartment boxes for ornaments |
Camping Gear | Pack in duffel bags or heavy-duty plastic containers |
Always label the boxes clearly to make future unpacking easier.
Labelling & Color-Coding Boxes for Every Room
Labeling and color-coding are essential for a smooth and efficient moving experience. They help you, your family, and your movers instantly recognize where each box belongs—reducing confusion, preventing damage, and speeding up both loading and unloading. A well-labeled box system is the backbone of the room-by-room packing method.
How to Use a Color Code System
Assign a unique color to each room to make identification effortless:
- Red – Kitchen
- Blue – Bedroom
- Green – Living Room
- Yellow – Kids’ Room
- Orange – Bathroom
- Purple – Home Office
- Grey – Garage/Storage
Apply colored tape or color stickers to at least two sides of each box. This enables instant recognition even when boxes are stacked tightly.
Color Code Sample Table
Room | Color to Use |
Kitchen | Red |
Master Bedroom | Blue |
Living Room | Green |
Kids’ Bedroom | Yellow |
Bathroom | Orange |
Home Office | Purple |
Garage/Storage | Grey |
This system helps movers place boxes directly in the correct rooms without needing to ask.
What Information to Write on Each Box
In addition to color coding, add clear labels to each box:
- Room Name (e.g., “Kitchen”)
- Detailed Contents (“Plates, Cups, Spices”)
- Fragile / Heavy
- Open First for essential items
- Orientation Arrows (“This Side Up”)
Write on at least two sides + top so the label is visible even when stacked.
Using QR or Barcode Apps for Inventory
For even better organization, you can use digital inventory tools:
- Scan a QR or barcode sticker on each box
- Save the item list inside the app
- Retrieve item location instantly during unpacking
- Perfect for large homes and long-distance moves
These apps help you track possessions and avoid losing items during transit.
Labelling for Fragile vs. Heavy Items
To prevent damage and ensure safe handling:
Box Type | Label to Use | Why It Helps |
Fragile Items | “FRAGILE – Handle With Care” | Alerts movers to avoid pressure |
Heavy Boxes | “HEAVY – Team Lift” | Prevents injury and mishandling |
Liquid Items | “KEEP UPRIGHT” | Avoids spills and leaks |
Essentials Box | “OPEN FIRST” | Ensures important items stay accessible |
Clear labeling ensures movers immediately know how to handle each box without delays.
Common Room-by-Room Packing Mistakes to Avoid
Even with the best packing strategy, small mistakes can lead to broken items, delays during unpacking, or unnecessary stress on moving day. Understanding the most common packing errors helps you avoid them and ensures your belongings stay safe throughout the move.
Overstuffing Boxes & Causing Damage
One of the biggest mistakes people make is trying to fit too much into a single box. Overfilled boxes:
- Become too heavy to carry safely
- Are more likely to break from the bottom
- Put pressure on fragile items
- Slow down the moving team
Tip: Use small boxes for heavy items (books, kitchen items, tools) and large boxes for lightweight items (pillows, bedding, decor).
Forgetting to Declutter Before Packing
Packing items you no longer need increases workload, costs, and clutter in your new home. Avoid this by:
- Sorting items into Keep / Donate / Discard piles
- Removing duplicates (kitchen tools, stationery, clothing)
- Discarding expired items from bathrooms and kitchens
- Not taking broken or rarely used items
Decluttering should always happen before you start packing.
Not Using Enough Padding for Breakables
Fragile items like plates, bowls, glasses, frames, and decor need proper cushioning. Mistakes include:
- Wrapping multiple items together
- Leaving empty spaces inside boxes
- Using the wrong type of wrapping material
- Placing heavy items on top of fragile items
Correct Method: Individually wrap each piece, use foam sheets or bubble wrap, and fill gaps with crushed paper.
Leaving Essential Items Until the End
Packing essentials at the last minute often leads to:
- Missing daily-use items
- Difficulty finding toiletries, chargers, or medicines
- Increased stress on moving day
Prepare an Essentials Box early containing:
- Toiletries
- Towels
- Chargers
- Daily medicines
- Basic kitchen items
- A few plates & cups
- First-night bedding
Mixing Items From Different Rooms
Mixing items from the kitchen, bedroom, and bathroom in one box causes major confusion during unpacking. Stick to the room-by-room rule:
Room | Do Not Mix With |
Kitchen | Bathroom or bedroom items |
Bedroom | Office papers or pantry items |
Bathroom | Electronics or documents |
Office | Toys, decor, or clothes |
Each box should contain items from only one room and be labeled accordingly.
Many of these mistakes can be avoided by understanding how professional packers and movers work before moving day.
Room-by-Room Moving Day Checklist
The moving day checklist ensures nothing is left behind and every room is properly inspected before you lock the door for the last time. A structured room-by-room approach helps you complete final tasks efficiently, avoid panic, and keep essentials easily accessible at your new home. Use this checklist to guide your final day preparations.
Last-Minute Packing Tasks
Before movers arrive, complete these final tasks:
- Pack chargers, toothbrushes, toiletries, and daily-use medicines
- Empty trash cans in all rooms
- Pack leftover pantry items and refrigerated essentials (if moving locally)
- Disconnect appliances and secure cords with tape
- Seal all open boxes tightly with packing tape
- Keep keys, wallets, IDs, and documents in a personal bag
- Prepare a cooler or insulated bag for perishable items
This ensures you don’t forget anything crucial during the rush.
Room-Wise Inspection Before Leaving
Do a final walkthrough of each room:
Room | What to Check |
Kitchen | Cabinets empty, appliances unplugged |
Bedroom | Closets and drawers empty |
Bathroom | No toiletries left behind, cabinets empty |
Living Room | TV mounts removed, decor packed |
Kids’ Room | Toys, books, small items cleared |
Home Office | Files, documents, and small accessories packed |
Garage | Tools secured, hazardous items disposed properly |
Inspect storage areas, behind doors, and high shelves to ensure nothing is missed.
Preparing Your “First-Night Essentials Box”
This box should be easily accessible and loaded last so you can unpack it first at your new home. Include:
- Bedding for one night
- Toiletries and hygiene items
- A few plates, cups, and cutlery
- Chargers, power bank, extension board
- Basic cleaning supplies
- Fresh clothes for the next day
- Snacks and drinking water
- Small toolkit (screwdriver, scissors, tape)
This prevents unnecessary searching and ensures you can settle comfortably on the first night.
Coordinating with Movers for Faster Unloading
Effective communication with movers saves time:
- Tell movers which color corresponds to which room
- Guide them on placement of heavy furniture
- Ensure boxes marked “Fragile” are handled with care
- Keep pathways clear in both homes for smooth movement
- Have a quick plan for what goes where in the new home
Good coordination ensures an efficient unloading process and reduces setup time.
If you’re relocating a full household, it’s also important to know what protection your belongings have during transit. Understanding what transit insurance covers during house shifting can help you avoid losses due to damage.
FAQs About Room-by-Room Packing Method
It’s a systematic moving strategy where you fully pack one room at a time. This prevents mixing items, improves labeling accuracy, and makes unpacking much easier.
Start with low-use rooms such as guest rooms, storage rooms, or dining areas. Save high-use spaces like the kitchen and bathroom for the final days.
Use a simple color code, write the room name, detailed contents, and add “Fragile,” “Heavy,” or “Open First” when needed. Label at least two sides plus the top.
Wrap each item individually, stack plates vertically, stuff cups with paper, and use bubble wrap or foam sheets. Pack them in dish-pack boxes with good padding.
Avoid overfilling boxes, mixing items from different rooms, or packing essentials last. Use enough padding for breakables and declutter before you begin.
Add toiletries, fresh clothes, chargers, bedding, snacks, basic kitchen items, a small toolkit, and important documents. Keep this box easily accessible.