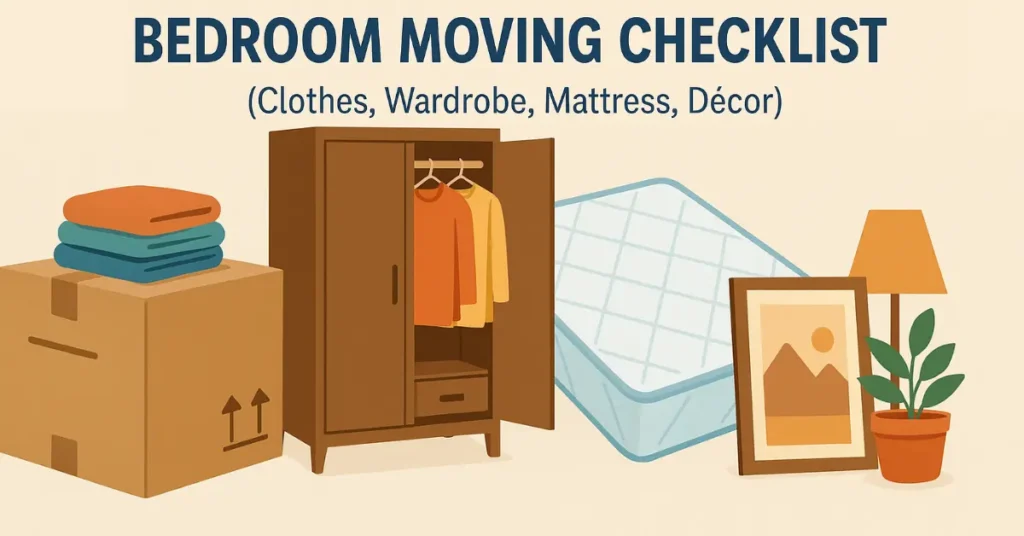
Bedroom Moving Checklist (Clothes, Wardrobe, Mattress, Décor)
Plan your move smarter with this complete Bedroom Moving Checklist, crafted to help you sort, pack, protect, and label everything—from clothes and wardrobe items to mattresses and décor. For professional assistance, you can also explore Trusted Packers and Movers.
Why a Bedroom Moving Checklist Matters
Moving your bedroom is often more time-consuming than expected because it contains a mix of bulky furniture, fragile décor, and personal items that require careful handling. A structured checklist ensures that nothing is overlooked and reduces the chances of damage during the move.
Common Mistakes People Make When Packing Bedroom Items
Many people rush through the process, leading to:
- Overpacking boxes, causing breakage
- Folding delicate clothes incorrectly
- Not dismantling furniture the proper way
- Forgetting to label boxes
- Ignoring mattress protection
How a Checklist Saves Time and Prevents Damage
A proper checklist breaks down tasks into smaller actions—sorting, grouping, wrapping, labeling, and checking. This reduces stress and ensures that every category of bedroom items (clothes, décor, accessories, bedding, and furniture) is packed efficiently.
What to Prepare Before You Start Packing
Use the following preparation table:
Task | Details |
Get Packing Materials | Boxes, wardrobe boxes, mattress bag, bubble wrap, tape |
Create Sorting Categories | Keep, Donate, Sell, Discard |
Measure Furniture | Especially wardrobes, bedframes, mattress size |
Clear Pathways | Ensure safe movement during packing |
Additional preparation tips:
- Keep essential personal items (jewelry, documents, medicines) in a separate pouch.
- Take photos of furniture before dismantling for easy reassembly.
- Keep a dedicated “moving folder” with warranties, hardware bags, and box index lists.
Pre-Move Sorting: How to Declutter Your Bedroom Efficiently
Sorting your bedroom items before packing not only reduces moving costs but also makes unpacking faster and more organized. A systematic approach helps you identify what genuinely needs to be moved and what can be donated, sold, or discarded.
Create Separate Keep / Donate / Discard Categories
Begin by removing all items from your wardrobe, drawers, under-bed storage, and shelves. Divide them into:
- Keep – items you use regularly or seasonally
- Donate – clothes in good condition that you no longer wear
- Sell – gadgets, décor, or furniture pieces that have resale value
- Discard – damaged, worn-out, or expired items
Place labeled bags or boxes for each category.
Room-by-Room Inventory Method
Create a simple inventory for bedroom zones like wardrobe, dresser, bedside table, vanity, and décor shelf. This prevents missing small but important items such as chargers, watches, or accessories.
Inventory Example
Bedroom Area | Items to Check | Action |
Wardrobe | Clothes, accessories | Sort into 4 categories |
Dresser | Undergarments, socks | Remove + fold set |
Vanity | Makeup, perfumes | Pack separately |
Décor Shelf | Frames, candles, art | Wrap + label “fragile” |
Questions to Ask Yourself While Sorting
- Have I used this item in the last 6–12 months?
- Does it have sentimental or functional value?
- Is it cheaper to replace than move?
- Is it in good enough condition to justify packing?
These questions help you decide practically instead of packing unnecessary clutter.
How to Handle Sentimental Items and Memorabilia
Sentimental items—photo albums, diaries, gifts, travel souvenirs—require careful packing. Keep them in a dedicated “Memory Box” to ensure they aren’t mixed with other items.
Tips:
- Wrap fragile souvenirs in soft fabric
- Use small padded boxes for keepsakes
- Label the box “Handle with Care – Sentimental Items”
Packing Clothes the Right Way (Folded, Hanging, Seasonal)
Clothes are often the biggest volume of items in a bedroom, so packing them correctly saves space, prevents wrinkles, and keeps everything easy to unpack. Use a combination of wardrobe boxes, vacuum bags, and labeled cartons to streamline the process.
Best Way to Pack Daily Wear and Folded Clothes
Start by folding everyday wear items neatly and placing them in medium-sized boxes to avoid overloading. Heavy items like jeans or sweaters should go at the bottom, while lighter clothes like t-shirts and tops should be on top.
Quick Tips:
- Use suitcase space for heavy clothing to reduce the risk of box damage.
- Wrap delicate fabrics in tissue or soft scarves.
- Avoid mixing shoes with clothes.
How to Use Wardrobe Boxes for Hanging Clothes
Wardrobe boxes allow you to move hanging clothes directly without taking them off the hangers. This keeps them wrinkle-free and saves time.
Benefits of Wardrobe Boxes:
- No folding required
- Protects expensive clothing (formal wear, coats)
- Simplifies unpacking
How to use them:
- Group clothes by type (shirts, blazers, dresses)
- Move them directly from your closet rod to the wardrobe box rod
- Secure hangers with a rubber band so they don’t shift during transport
Packing Seasonal Clothes (Winter, Rainy, Occasional)
Seasonal clothes like jackets, woolens, festive wear, and rain gear can be packed early since you won’t need them during the move.
Use clear-lid boxes or labeled cartons so you can quickly identify seasonal items after moving.
Using Vacuum Bags for Bulkier Fabrics
Vacuum bags help you compress bulky items like blankets, sweaters, shawls, and padded jackets. This reduces volume by up to 70% and makes stacking easier.
Do not use vacuum bags for:
- Silk
- Cashmere
- Delicate fabrics
They may weaken under compression.
Labeling Clothing Boxes for Quick Access
Always label clothing boxes based on category or frequency of use.
Label Ideas:
- “Daily Wear – Open First”
- “Winter Clothes”
- “Formals / Office Wear”
- “Kids’ Clothes”
Add arrows to show the upright direction and mark boxes that contain delicate fabrics.
Wardrobe Dismantling and Packing Guide
Wardrobes are among the heaviest and most complex bedroom items to move. Proper dismantling and packing ensure safety, prevent damage, and make reassembly easier at your new home. Follow these structured steps to protect wooden, metal, and mirrored wardrobes.
How to Empty and Prepare the Wardrobe for Dismantling
Start by removing all clothes, drawers, hangers, and accessories. Wipe the interior to remove dust so it doesn’t spread during dismantling.
Preparation Checklist:
- Remove all loose items
- Take photos of hinges, screws, and shelf placements
- Keep tools (screwdriver, Allen key, pliers) ready
- Clear at least 4–5 feet of space around the wardrobe
This ensures safe dismantling without scratching the floor or nearby walls.
Safe Steps to Dismantle the Wardrobe Frame
Most wardrobes can be dismantled into panels, doors, shelves, and hardware components.
Step-by-Step Process:
- Remove mirrors, glass doors, or detachable panels first
- Unscrew the side panels while a helper supports the weight
- Detach the top frame and bottom base
- Remove shelves and hanging rods
- Flatten large panels and stack them vertically
Safety Tips:
- Avoid forcing stuck screws — use penetrating oil
- Keep children/pets away during dismantling
- Do not drag panels; lift them to prevent chipping
How to Pack Mirrors, Glass Doors, and Panels
Mirrors and glass components need extra care.
Protection Method:
- Cover with soft blankets or microfiber cloth
- Wrap with bubble wrap
- Use cardboard corner protectors
- Label “Fragile – Glass” on both sides
Keep glass items upright, never flat, to prevent pressure cracks.
Bagging and Labelling Screws, Bolts, and Hardware
Hardware is the most commonly lost part during a move. To avoid issues during reassembly:
- Place screws, nuts, bolts, hinges, and brackets in zip-lock bags
- Label each bag by panel/door name
- Tape the bag to the corresponding wardrobe panel
- Keep an additional photo for reference
Protecting Wooden vs. Metal Wardrobes During Transit
Different materials require different packing methods.
Wardrobe Type | Packing Method |
Wooden | Wrap in moving blankets + bubble wrap for edges |
Metal | Use foam sheets + tape to avoid dents |
Mirrored/Glass | Heavy bubble wrap + cardboard + “Fragile” labels |
Ensure panels are transported upright and not stacked flat to avoid warping.
Mattress Preparation and Safe Packing Techniques
A mattress is one of the most valuable and frequently used items in your bedroom. Packing it incorrectly can lead to stains, tears, odor issues, and even structural damage—especially for memory foam and latex mattresses. Preparing it properly ensures a hygienic, safe, and wrinkle-free move.
How to Clean Your Mattress Before Moving
Before packing, give your mattress a proper cleaning to avoid trapped odors during transport.
Cleaning Steps:
- Vacuum the entire surface, including edges
- Sprinkle baking soda for 30 minutes to absorb odor
- Air-dry in sunlight if possible
- Use a fabric-safe disinfectant spray for hygiene
This prevents moisture buildup and ensures the mattress stays fresh at the new home.
Choosing the Right Mattress Bag or Cover
A heavy-duty waterproof mattress bag protects your mattress from dirt, rain, and accidental spills.
What to Use:
- Plastic mattress cover for local shifting
- Thick protective bag for long-distance moves
- Extra tape to seal edges and prevent dust entry
Avoid:
- Thin plastic sheets that tear easily
- Leaving mattress exposed during loading
Packing Tips for Memory Foam, Latex, and Spring Mattresses
Different mattress types react differently to pressure, so use the correct method:
Mattress Type | Packing Instruction |
Memory Foam | Keep flat; avoid folding; use strong cover |
Latex | Never bend; wrap in breathable material |
Spring Mattress | Can be kept upright for short periods |
Memory foam and latex mattresses can crack or deform if folded. Always carry them with two people.
The Correct Way to Load and Transport a Mattress
- Keep mattress on its side inside the moving truck
- Use straps to prevent shifting
- Avoid stacking heavy boxes on top
- Do not store the mattress upright for long periods (overnight is fine; long-term may distort shape)
Mistakes to Avoid When Moving a Mattress
- Folding foam mattresses
- Dragging them on the floor (tears fabric)
- Packing while mattress is damp
- Using bedsheets instead of protective covers
- Forgetting to label “This Side Up”
These small precautions extend the life of your mattress during the move.
How to Pack Bedroom Décor (Frames, Lamps, Mirrors, Art)
Bedroom décor includes some of the most fragile and oddly shaped items—photo frames, lamps, paintings, sculptures, candles, vases, and decorative pieces. Proper packing prevents scratches, cracks, and breaks during loading and transport.
Preparing Delicate Décor Before Wrapping
Before wrapping anything, clean the décor items to prevent dust scratches. Remove detachable parts such as lamp shades, light bulbs, frame stands, or hooks.
Pre-Packing Checklist:
- Clean photo frames, lamps, and décor pieces
- Remove bulbs from lamps and pack separately
- Separate frames from stands
- Lay items on a padded surface before wrapping
Wrapping and Cushioning Techniques for Fragile Items
Fragile décor items need multi-layer protection.
Best Wrapping Method:
- Wrap the item in soft fabric or microfiber cloth
- Add a layer of bubble wrap around all sides
- Use cardboard sheets to add structure
- Tape securely but avoid overtightening
Place wrapped items vertically inside the box and fill empty spaces with crumpled paper or packing peanuts to prevent movement.
Packing Lamps, Floor Lamps, and Lampshades
Lamps are delicate because of their shape and wiring.
How to Pack Lamps:
- Remove the bulb and harp first
- Wrap the base in thick bubble wrap
- Pack the lampshade separately in a wide box
- Use pillows or towels to cushion both items
Never pack lampshades tightly; they bend easily.
Securing Wall Art, Paintings, and Photo Frames
For paintings, framed art, and glass-covered photos:
- Wrap the glass with masking tape in an “X” pattern to reduce shattering
- Cover the frame with bubble wrap and secure with cardboard corners
- Pack upright—not flat—to avoid pressure on the glass
Label these boxes with “Fragile – Artwork” on all sides.
Labeling Fragile Décor Boxes to Prevent Breakage
Labeling is crucial because movers often stack boxes quickly.
Decor Box Label Examples:
- “Fragile – Glass Inside”
- “Do Not Lay Flat”
- “This Side Up”
- “Artwork – Handle Carefully”
Place labels on the top + all four sides for maximum visibility.
Packing Jewelry, Accessories, and Personal Items Safely
Jewelry, watches, makeup, grooming kits, and personal accessories are highly valuable and easy to misplace during a move. These items should always be packed separately and kept with you instead of being loaded onto the moving truck.
Sorting Jewelry by Type for Easier Packing
Start by grouping your jewelry into categories so they don’t tangle or scratch each other.
Sort into:
- Necklaces
- Earrings
- Bracelets
- Rings
- Watches
- Anklets
Once sorted, you can pack each type in its own small container or pouch. This reduces the risks of knots, damage, or loss.
Using Jewelry Organizers, Zip Bags, and Hard Cases
Jewelry needs multiple layers of protection.
Best Packing Options:
- Jewelry organizers for necklaces, chains, and bracelets
- Small zip-locks for earrings and rings
- Hard-shell cases for watches and costly items
- Pill organizers for small studs and nose pins
- Microfiber cloth to wrap delicate metals
These methods keep everything visible, separated, and protected during transit.
Extra Tip: Put all small jewelry pouches into one single “Jewelry Box” to avoid misplacement.
Keeping Valuables With You (Not in the Moving Truck)
Jewelry and important personal items should always travel with you.
Keep the following items in your handbag or personal backpack:
- Jewelry box
- Watches
- Wallets and ID cards
- Cash or emergency money
- Portable hard drives / USBs
- Sentimental items
Do not pack these items in cartons or send them with movers.
Packing Makeup, Grooming Tools, and Personal Accessories
Makeup and accessories can spill or break if packed incorrectly.
How to Pack Them Safely:
- Place makeup palettes in bubble wrap
- Seal liquid cosmetics in zip-locks to avoid leaks
- Wrap grooming tools (trimmers, razors, combs) in soft cloth
- Keep daily-use items in a separate “Open First – Personal Kit”
This avoids spills, stains, and accidental damage.
Labeling Bedroom Boxes for Easier Unpacking
A well-labeled bedroom box system ensures smooth unloading, faster unpacking, and prevents accidental mishandling. Proper labeling also helps movers understand which boxes need extra care, immediate unloading, or special placement inside the new home.
Color-Coding Labels by Room and Item Type
Color-coding makes the unpacking process 2x faster because movers can instantly identify which box belongs to which room.
Color-Coding Ideas:
- Blue – Clothes
- Yellow – Décor
- Green – Bedding
- Red – Fragile items
- Orange – Accessories & personal items
You can use color stickers, colored tape, or printed labels. Place the same color on the room’s door at the new house to guide movers.
How to Create a Box Index or Numbering System
A box index helps you track every box and quickly find essential items after shifting.
How the Index Works:
- Number each box (Ex: Bedroom Box 1, Bedroom Box 2…)
- Maintain a short list of contents for each box
- Keep the index in your phone + a paper copy
Example Index
Box No. | Label | Contents | Priority |
Box 1 | Daily Wear | T-shirts, pants | High |
Box 2 | Fragile Décor | Frames, candles | High |
Box 3 | Winter Wear | Jackets, sweaters | Low |
Box 4 | Accessories | Belts, scarves | Medium |
This prevents confusion and ensures no box gets lost during transport.
Marking Fragile, Heavy, and Priority Boxes
Use bold markers or printed stickers to clearly highlight the nature of each box.
Marking Examples:
- Fragile – Handle with Care
- Heavy – Lift from Bottom
- This Side Up
- Priority – Open First
- Clothes – Do Not Crush
Such markings prevent movers from stacking heavy boxes on delicate items.
Preparing an “Open First” Bedroom Essentials Box
This is the box you must open immediately after arriving at the new place.
What to Include:
- 1 bedsheet + pillow covers
- Nightwear / comfortable clothes
- Charging cables
- Basic toiletries
- Daily makeup / grooming items
- Wallet/keys holder
- A small table lamp
This saves you from digging through multiple boxes after a tiring move.
Final Bedroom Moving Day Checklist (Before the Movers Arrive)
The final hours before the movers arrive are crucial. A well-prepared bedroom ensures faster loading, zero confusion, and minimal damage. This checklist helps you complete all last-minute tasks smoothly and stay organized on moving day.
Ensure All Packing Is Completed Before Movers Arrive
Movers work most efficiently when everything is pre-packed and ready to move. Last-minute packing slows the process and increases the chance of mistakes.
What to finish before movers arrive:
- Seal all clothing boxes
- Pack décor and label as “Fragile”
- Dismantle the wardrobe completely
- Wrap the mattress in a protective cover
- Ensure all personal items are packed separately
- Keep hardware bags taped to furniture panels
Keeping the bedroom fully packed ensures movers can begin loading immediately.
Protect Floors, Corners, and Door Frames
During loading, heavy furniture may brush against walls and doors. Prevent scratches and dents with quick protection techniques.
Protection Tips:
- Cover floor with old blankets or cardboard sheets
- Wrap sharp wardrobe corners with foam
- Place mats at the entrance to avoid dust and dirt
- Use corner guards on doors and walls
These small steps reduce repair costs after moving.
Keep Cash, Keys, Documents, and Essentials Handy
Never pack essential items in the moving truck.
Keep with you:
- House keys (old + new)
- Cash for tips or emergencies
- ID cards, documents, and files
- Medical kit
- Jewelry box
- Daily-use makeup and grooming tools
- Phone chargers and power bank
Store everything in a handbag or backpack that stays with you at all times.
Walkthrough Check: Closets, Drawers, and Under the Bed
Before movers start loading, double-check the entire bedroom.
Quick Walkthrough Checklist:
- Open all drawers (confirm empty)
- Check under the bed for small items
- Check behind curtains/furniture
- Inspect shelves for décor
- Verify mattress is dry and sealed
A final walkthrough ensures nothing is forgotten.
Guide the Movers on Fragile or Priority Bedroom Items
Movers appreciate clear instructions. Tell them which boxes need special care.
Things to communicate:
- Boxes marked as Fragile
- Artwork or décor that must stay upright
- Mattress orientation (“Do Not Bend”)
- Priority boxes to unload first
- Heavy boxes that require two-person lifting
Clear communication helps avoid mishandling and speeds up the entire shifting process.
Conclusion Summary
Moving your bedroom becomes significantly easier when you follow a structured checklist that covers sorting, packing, labeling, and protecting each item category. By organizing clothes, accessories, and décor in advance, dismantling the wardrobe correctly, and using proper protection for your mattress, you minimize damage and speed up the entire shifting process. Clear labeling and an essentials box ensure stress-free unpacking, while a final moving-day walkthrough helps you avoid forgotten items or last-minute chaos. With the right preparation and careful handling, your bedroom transition to a new home becomes smoother, safer, and far more efficient.
Need Expert Help?
Why handle everything alone when professionals can make your move smoother and safer? 6 Packers and Movers offers trusted, affordable, and well-trained experts who take care of packing, loading, transporting, and unpacking with complete safety. Whether it’s your wardrobe, mattress, décor, or personal items—our team ensures everything is handled with care.
Relocate smart. Relocate stress-free. Your bedroom move deserves the best!